How to Winterize Outdoor Faucets: 7 Steps Before the First Freeze
Learning how to winterize outdoor faucets is one of the simplest, highest-value jobs on the fall home maintenance list. It takes less than an hour for most homes, costs very little, and can prevent a burst pipe, a flooded basement wall, and an emergency plumber’s bill. Yet outdoor faucets are easy to forget once the garden season ends. This guide walks you through the full process, so you can shut your outdoor water down properly before the first hard freeze — and restart it safely in spring.
An outdoor faucet looks tough, but it is more vulnerable than indoor plumbing. Its pipe passes through an exterior wall, exposed to cold air outside and often to an unheated basement or crawl space inside. When trapped water freezes, it expands by about nine percent, building pressure until the pipe or a fitting inside the wall splits — and you may not notice until spring, when melting ice lets pressurized water leak into the wall.
Why Winterizing Outdoor Faucets Matters So Much
A burst outdoor line is not a small drip. A split line inside a wall can release gallons of water per minute once the ice thaws, soaking insulation, drywall, and flooring — and if it hides behind a finished basement wall, it may go unnoticed for days, encouraging mold and rot. Insurance may cover sudden damage, but prevention is far cheaper than deductibles and disruption.
Freeze damage is also cumulative: a pipe that survives one winter with water sitting in it may develop a hairline crack that fails at the next cold snap. Faucets suffer too — washers harden and handles seize. If you have ever turned on an outdoor faucet in spring only to find it still dripping after you turn it off, winter wear is one likely culprit.
When Should You Winterize Outdoor Faucets?
Do the job before the first hard freeze — for most of the United States, sometime in fall, well before sustained temperatures drop below 28°F. A light frost in the low 30s rarely bursts a pipe, but a hard freeze lasting hours below 28°F can. Do not wait for a freeze warning and then scramble — stores sell out of covers and plumbers get busy.
A practical rule: winterize when you put the garden to bed — after the last watering and hose draining. When nighttime lows regularly dip into the 30s, do the job this weekend.
What You Will Need
- A bucket or old towels for draining the line
- Insulated faucet covers (foam dome covers) for each outdoor faucet
- Pipe insulation or foam sleeves for exposed pipe in unheated spaces
- A flashlight for dark basement corners
- Labels or masking tape for marking shutoff valves
Faucet covers cost only a few dollars each. If a shutoff valve is stiff, penetrating oil applied a day ahead can help — but never force a valve that will not move; a broken valve is a plumbing job.
How to Winterize Outdoor Faucets in 7 Steps
Work through these steps for each outdoor faucet, one at a time. The order matters: hoses first, then the interior shutoff, then draining, then covers last.
Step 1: Disconnect, Drain, and Store Every Hose
Start outside. Remove every garden hose, splitter, timer, and sprayer from each outdoor faucet. This step alone removes the biggest single cause of winter faucet damage: a connected hose traps water in the faucet and pipe, so the line cannot drain even if you shut off the interior valve. Drain each hose on a slope, coil it loosely, and store it in a garage or shed. Also check each faucet for a cracked handle or mineral buildup, and note repairs needed before spring.
Step 2: Find the Interior Shutoff Valve for Each Faucet
Go inside and find the valve controlling water to that faucet. In most homes it is in the basement or crawl space, on the pipe running toward that exterior wall. Without a basement, check a utility closet, laundry area, or garage wall. Label each valve you find — “front faucet,” “back faucet” — so next fall’s job takes two minutes. If a faucet has no dedicated shutoff at all, that line is unprotected: ask a plumber to install an accessible valve before winter.
Step 3: Turn Off the Interior Shutoff Valve
Turn the interior valve clockwise until it stops. A gate valve has a round wheel handle; a ball valve has a lever that should end up perpendicular to the pipe when closed. Do not over-tighten a gate valve — snug is enough. If a valve drips from its stem, tighten the packing nut gently or plan a replacement. Leave the valve closed all winter. If you need outdoor water during a mild spell, use the faucet and repeat the full shutdown afterward — a valve opened and forgotten is how many burst pipes happen in January, not December.
Step 4: Open the Outdoor Faucet to Drain the Line
Go back outside and open the outdoor faucet fully. Water trapped between the interior valve and the faucet will drain out — sometimes just a trickle, sometimes a surprising amount. Let it drain completely, and leave the faucet open for the winter. An open faucet gives any remaining water room to expand without building pressure, This feels counterintuitive, but it is safe: with the interior valve closed, no pressurized water can reach the open faucet. Part of learning how to winterize outdoor faucets is trusting this step — closed inside, open outside.
Step 5: Drain the Bleeder Cap, If Your Valve Has One
Many interior shutoff valves have a small bleeder cap on the side of the valve body. With a bucket or towel underneath, open this cap slowly. It lets air into the line so the last trapped water can drain out through the outdoor faucet, and a little water may come out of the bleeder itself. Once draining stops, close the cap again — snug, not forced. Not every valve has one, and that is fine; the open faucet and gravity do most of the draining. Skipping this step often leaves a cup or two of water in a low pipe section — exactly the water that freezes first.
Step 6: Insulate Exposed Pipe and Fit Faucet Covers
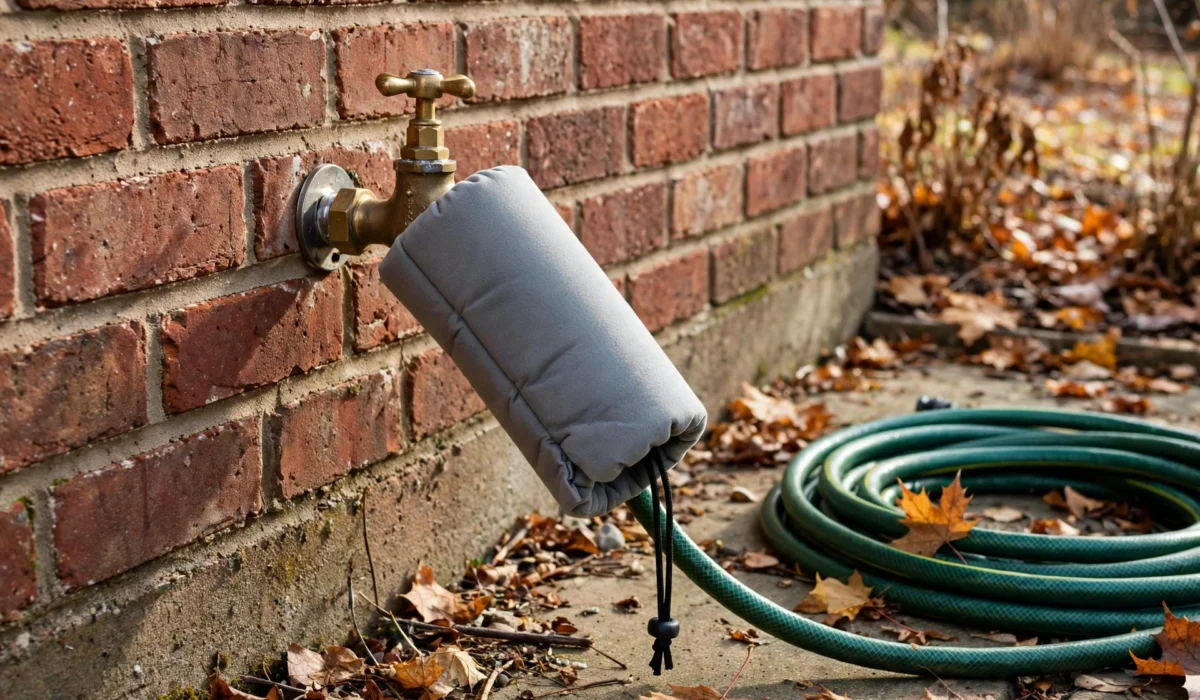
With the line drained, fit a foam faucet cover over each outdoor faucet, pulling its loop or strap tight so it sits flush against the wall. Covers slow heat loss and block wind from blowing into the outlet — excellent cheap insurance on a drained line. Inside, insulate exposed pipe feeding the faucet in unheated spaces: foam sleeves slip on in seconds and should cover the full run, including elbows, with joints taped. Also seal gaps where the pipe passes through the wall, as recommended in Energy Saver guidance on insulation. For a broader fall routine, work through your seasonal maintenance checklist at the same time.
Step 7: Check, Label, and Set a Spring Reminder
Finish by walking the job once more: every hose stored, every interior valve closed, every outdoor faucet open, every cover fitted. Set a reminder to reverse the process in spring in the right order — remove covers, close the outdoor faucet, then slowly reopen the interior valve while watching for leaks.
Frost-Free Faucets vs. Standard Faucets: What Changes?
Many newer homes have frost-free (also called frost-proof) sillcocks. These are longer valves whose shutoff seat sits 8 to 12 inches inside the heated wall, rather than right at the outdoor handle. When you turn one off, water stops inside the warm part of the house and the outer pipe drains by gravity — provided it was installed with a slight downward pitch and nothing blocks the drain path.
That design is a genuine improvement, but frost-free does not mean freeze-proof. A hose left connected defeats the whole mechanism: trapped water cannot drain, and the line can split just like a standard faucet. One installed level, or sloping upward into the house, also holds water instead of draining. So the routine is nearly the same — disconnect hoses, add a cover — with the interior shutoff optional. When in doubt about how to winterize outdoor faucets of either type, do the full shutdown: it harms a frost-free faucet nothing, while skipping it on a standard faucet risks everything.
| Faucet type | How it protects against freezing | What you must still do each fall |
|---|---|---|
| Standard hose bib | It does not — the valve seat sits at the cold exterior wall. | Full shutdown: disconnect hose, close interior valve, drain line, fit a cover. |
| Frost-free sillcock | The valve seat sits 8–12 inches inside the warm wall and drains when off. | Disconnect hoses (essential), check downward pitch, fit a cover. |
| No interior shutoff | It does not — the line stays pressurized all winter. | Disconnect hoses, fit a cover, have a plumber install a shutoff. |
Common Mistakes That Undo a Good Winterizing Job
The most common mistake is leaving a hose connected “just for one more week” that stretches into January — splitters and timers count too. The second is closing the interior valve but never opening the outdoor faucet, leaving trapped water exactly where it can freeze: always do both halves of the shutdown. Relying on a faucet cover alone also fails — covers slow heat loss but do not remove water. Letting a faucet drip through winter fails too — it can freeze at the outlet and build ice back into the pipe. Finally, do not forget rarely used faucets — the side-yard bib or the one behind the garage bursts most often. The same walk is a good time to check that your furnace is ready for winter.
What If Winter Arrives Before You Winterize?
If a freeze has already happened, start with hoses: disconnect them immediately, even in cold weather, then do the interior shutoff and drain as soon as you safely can. If a faucet is already frozen shut, do not force the handle — that can crack it. Signs of a burst line: water pooling near a foundation wall, a damp spot on an interior wall near a faucet, or a water meter that moves when no water is running. If you suspect damage, keep the interior valve closed and call a plumber; do not reopen the line to “test” it. See also our guide on why pipes can freeze even when it was not that cold outside, and the Family Handyman’s guide to winterizing a hose spigot.
Frequently Asked Questions
Do I need to winterize outdoor faucets if I have frost-free faucets?
Yes — disconnect all hoses, every fall, without exception. A frost-free faucet only drains if nothing blocks the drain path, and a connected hose blocks it completely.
Should I leave the outdoor faucet open or closed all winter?
Leave it open after closing the interior shutoff valve and draining the line. An open faucet lets residual water expand without pressure. Close it again before reopening the interior valve in spring.
Can I just put a cover on the faucet and skip the shutoff?
No. A cover slows heat loss but does not remove water from the pipe, and a full pipe can still freeze on a hard cold night. Covers supplement a proper shutdown; they never replace it.
When should I turn the outdoor water back on in spring?
Wait until hard-frost risk has passed, then reverse the steps: remove covers, close the outdoor faucets, and slowly reopen each interior valve while watching for drips.
Conclusion
Winterizing outdoor faucets is a small job with an outsized payoff, and now you know how to winterize outdoor faucets from start to finish. Disconnect the hoses, close the interior valves, drain each line, fit the covers, and label everything for next year. Done before the first hard freeze, those seven steps protect your pipes, your walls, and your wallet all winter — and make the spring restart a calm five-minute job.
Not sure what your home needs?
Build a free, personalized maintenance plan in under 2 minutes.
Build My Home PlanRelated Articles
 Seasonal Maintenance
Why Is My Outdoor Faucet Still Dripping After I Turn It Off? (Normal vs. Real Problem)
A few seconds of dripping after you close a frost-free outdoor faucet is usually normal. A drip that…